So, I’ve thrown together a new blog. This is how I built it and how I ended on this tech stack. Pop over to my github page to view the code.
Years ago I used to blog. I used a system that I developed called siliconpanda. Siliconpanda was a multi-tenant content management system, it was created so I could scratch my dev itch whilst creating something useful. The system allowed me to throw together a site for a client pretty quickly and supply a nice user interface for them to create their own content. Some would (rightfully) say that wordpress fills this gap pretty nicely, but for me I wanted an excuse to play around with new tech; the site was built with the then brand new .net core and hosted on Azure, using as many of the new services they provided that I could shoe horn in.
In my evenings I would tinker; adding new features as fast as I could. After some time life got in the way and I was not able to give siliconpanda the support and time it needed, it soon only hosted one aging blog with stale articles. The cost of keeping the portal and site running with multiple databases and many services soon became a bit silly, and the constant dependabot emails became an annoyance. The aging tech was causing me a headache and didn’t bring much value. I finally said goodbye to siliconpanda by tearing down the infrastructure.
I decided that this year I wanted to improve my writing skills and to share some of my experiences, I looked to siliconpanda again to host my new blog. It felt over engineered for what I wanted, .net had also moved on and the tech was dated; it would take lots of effort to bring the site up to the standard I wanted before I could even write my first post. This would not do.
I set myself some principles to help me narrow my focus. The site should be:
- Cheap to run
- The cost of running siliconpanda for a single blog didn’t make much sense to me, I didn’t want to be in a position where I had to choose between content or cost. I wanted the site to be a record of my achievements, even if I took a break from writing. This meant no SQL.
- Easy to maintain
- I want the site to be easy to throw together, fast to load, easily transferable, and tech that doesn’t need me to update dependencies weekly. For me this meant no Node and limited JS. I want time tested tooling- markdown, HTML and CSS is good enough; no node_modules for me, thanks.
- No tracking
- Having visitors to the site would be lovely (Thanks for coming), but it’s not my current goal. I see no benefit in tracking users, it adds overhead and brings me no value. You won’t be seeing a cookie banner here.
- Less div tags and more semantic HTML
- I am a firm believer that HTML can do everything I want it to do without having to reinvent how it works. The byproduct of taking care to select the correct tags is clean code and accessibility. Using a div tag will be my last option.
Once I set myself these constraints I ended up with a site created using Jekyll, served by github pages, built using github actions, and versioned using git. This all comes to a grand total of £0.
Jekyll
Jekyll is a ruby based static site generator. Content is written in markdown and the pages are created using HTML and liquid templating. This was perfect, I could use git as my version control and database, and all my content would be written in markdown (a format that I use everyday).
GitHub Pages made hosting the site free and GitHub actions would deploy my site and articles on checkin.
It was gloriously simple. Getting started was a breeze, both GitHub’s and Jekyll’s documentation is well written and easy to follow.
If you want to get started you will need ruby installed on your machine (I use rbenv to manage my ruby versions, installed via brew). Then with just 3 commands you’re up and running:
- To install the jekyll gem
gem install bundler jekyll - To create a site
jekyll new . - To serve run locally
bundle exec jekyll serve
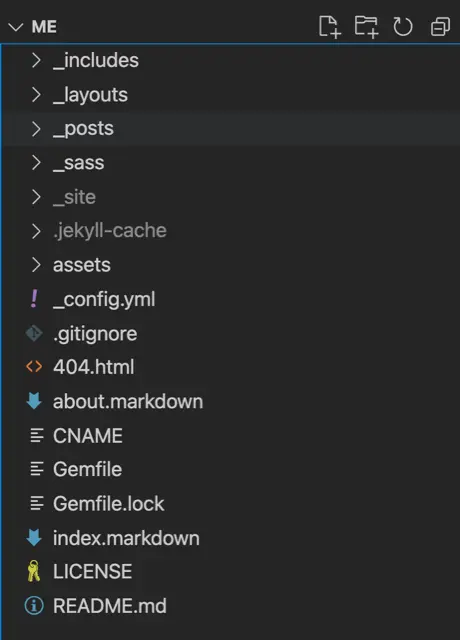
The file structure is pretty simple, from top to bottom we have:
_includesContains page consistent html- head, header and footer._layoutsContains different layout styles- default (like a base page), home, page and post._postsContains articles, written in markdown._sassSCSS files for styling._siteGenerated site (not source controlled).jekyll-cacheassetsImages and css entry point
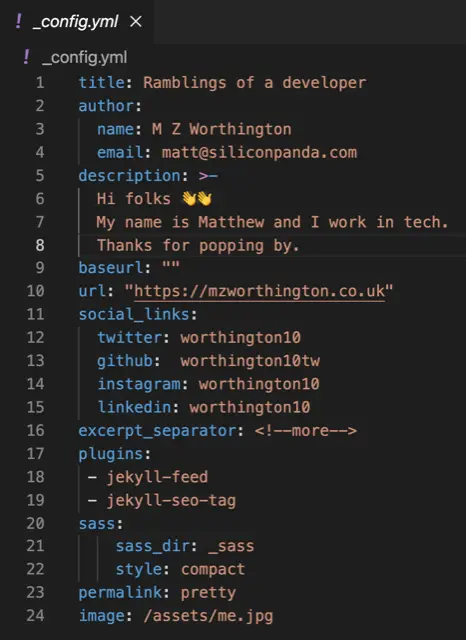
The config file makes updating site information super easy.
Jekyll will process files when they have a front matter block, this is the yaml between the two triple dashed lines at the top of the file.
In this example we set the layout to use, the title of the article, the date that it is published, categories (used when generating the URL) and the image to use (This is a custom variable that will change the circular image of the blog depending on this tag, or default to the picture of me).
Deployment
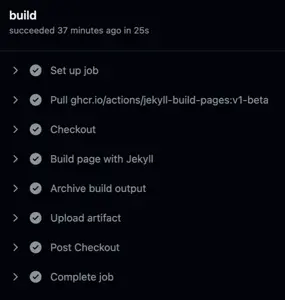
Github has a bot that is able to identify how to generate and deploy the site and is handled without any additional code.
The pipeline first builds the site and saves this as an artifact
Finally the artifact is retrieved and using the GitHub Pages API is deployed.
Lighthouse
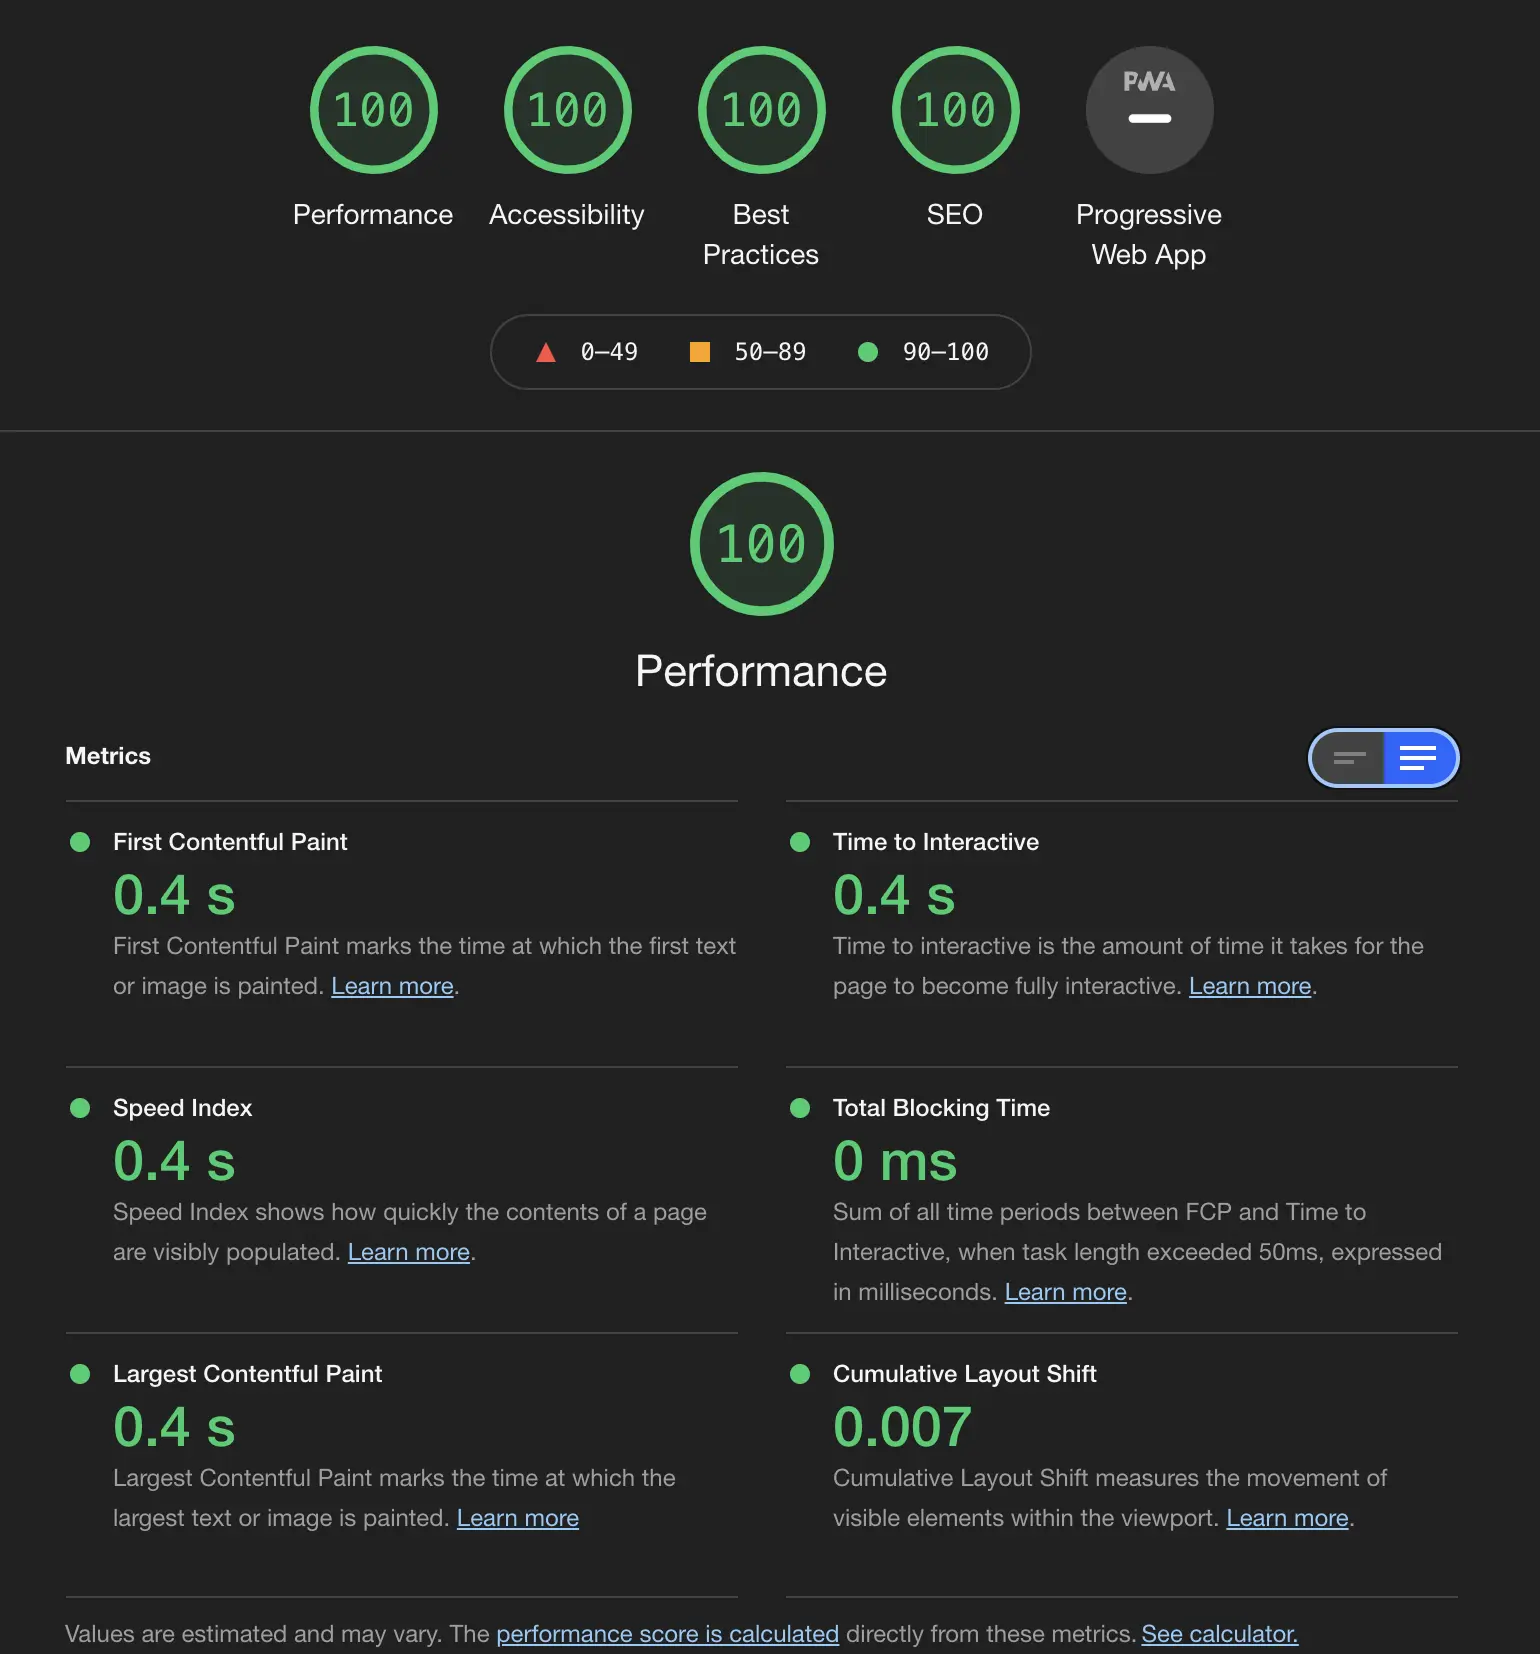
I use Lighthouse to measure websites performance, accessibility and SEO. Its a handy tool that baked into chromes dev tools (They even have a nice CLI that can be popped into pipelines).
The initial run came back with a perfect score.
Ta-da!
Styling wise I wanted something simple. Just enough to get me going. To give me a platform to share my thoughts and not be terrible on the eye. I feel that I achieved this.
I plan to give the styling a bit more love in the future, however for now I want to focus on content.
Desktop
Mobile
I’m pleased with how quickly I could get up and running. And the price point is just dreamy.
Get the code
